Search Results
All Categories
Clear
Search
Apply
Search in
Category
Reset
Filter by
Prev
Next
Guides
Log out
Account dashboard
Select your language
VIDEOS
https://learning.squarespace.com
WEBINARS
https://forum.squarespace.com
FORUM
/hc/requests/new#choose-topic
CONTACT US
LIVE CHAT: CLOSED
LIVE CHAT: OPEN
Log in
See All Results
Send
Choose a topic
We think this will help:
Still need to contact us?
Real-time conversation and immediate answers.
Live Chat
Monday - Friday:
4:00AM to 8:00PM EST
Send us a message and read our answer when it’s convenient for you.
Email
Contact us by email to get help with this topic.
24 hours a day
7 days a week
Log into Squarespace
Go back
This guide is not available in English. You will be redirected in 5 seconds
We currently offer live chat support in English only.
EMAIL SUPPORT IN SPANISH
CHAT IN ENGLISH
Squarespace 5 Help
For questions about the legacy Squarespace 5 platform, please visit its Help Center:
Back
Regain access to your account or site
If you’ve tried to
recover your Squarespace or Acuity account and still can’t access it, we’re here to help. Please enter as much information as you can, but if you’re not sure about specific details, provide your best guess.
Before you begin:
• Did you already try to recover your account through the login page? We’ll ask you to try that first if you haven’t yet.
• For your security, we’ll only provide account details to the account holder.
• For help recovering a Google Workspace account, contact us here.
Email address where we can contact you.
What situation led to the trouble accessing your account?
URLs of any websites connected to the account. Enter as many domains as possible.
Please attach both of the following documents:
• A government-issued ID. For example, a driver’s license, passport or permanent resident card.
• A bank statement that shows the bank header, bank accountholder name, and the most recent Squarespace charge. You are free to obscure other personal information in the document. (Not required for two-factor authentication issues.)
Note:
• If you entered multiple websites above, attach statements showing the most recent charge associated with every site.
• Ensure your files are .jpg or .png so we can view them.
Request Account Access
Follow these steps:
Learn More
Request a Refund
Hear back in 2 business days.
If you have a tax exemption certificate, attach it here. .pdf, .png, .jpeg file formats are accepted.
Use this form to submit a request about exemption from sales tax collected for Squarespace payments.
Enter the details of your request here. If you’re not based in a country or state where we collect taxes, and you believe we shouldn’t collect taxes from you, please explain.
If you have feedback about how we collect sales tax, submit it here.
Your feedback helps make Squarespace better, and we review every request we receive. Please note that we can't reply individually, but we’ll contact you if we need more details.
General sales tax feedback
Request an exemption from sales tax
Tell us more
Upload a screenshot of the issue you’re having, or the site content you'd like to modify, so we can help you more quickly. Learn how to take a screenshot here:
https://sqsp.link/hMaBjwSquarespace respects intellectual property rights and expects its users to do the same. Squarespace responds expeditiously to claims of copyright infringement committed using the Services.
To submit a notice of claimed copyright infringement, you will need to submit a notice of infringement using the form below.
Please be aware that in instances where Squarespace is merely the Registrar and does not provide web hosting services, Squarespace does not control the content and the content does not reside on Squarespace’s servers; you will need to resolve the claimed copyright infringement directly with the site owner or the web hosting service provider.
Squarespace's response to notices of alleged copyright infringement may include the removal or restriction of access to allegedly infringing material. Please note that information provided in a notice of copyright infringement may be forwarded to the user who posted the allegedly infringing content or the site owner.
Squarespace is committed to providing a service to our customers that is safe and trusted. If you believe that there is content on Squarespace that is illegal, please submit a notice of illegal content to Squarespace using the form below. We have introduced this reporting channel to customers in accordance with Article 16 of the European Union’s Digital Services Act (Regulation (EU) 2022/2065) (‘DSA’).
Report malware
Squarespace Domains LLC and Squarespace Domains II LLC are committed to providing a safe and trusted service. If you have a concern about a domain name registered with Squarespace, you can submit a report to let us know.
Malware, or malicious software, are programs designed to disrupt, damage, or gain access to a computer without the owner's knowledge. Malware includes viruses, spyware, ransomware, and other unwanted software. Malware being used through multiple sources are referred to as botnets.
To learn more about reporting other suspicious domain activity to Squarespace, visit
Reporting domain name abuse.
Before you begin:
• Ensure the domain you're reporting to us is
registered and managed through Squarespace.
• Visit our
Terms of Service and
Acceptable Use Policy to review our policies about abuse and fraudulent or illegal activity.
Report phishing or pharming
Squarespace Domains LLC and Squarespace Domains II LLC are committed to providing a safe and trusted service. If you have a concern about a domain name registered with Squarespace, you can submit a report to let us know.
Phishing is a type of fraud that attempts to deceive users into sharing sensitive information like credit card information, passwords, or account details.
Where phishing attempts to deceive users into sharing sensitive information, pharming attempts to redirect users to fraudulent sites through modified/hijacked DNS, instead of where the user originally attempted to go.
To learn more about reporting other suspicious domain activity to Squarespace, visit
Reporting domain name abuse.
Before you begin:
• Ensure the domain you're reporting to us is
registered and managed through Squarespace.
• Visit our
Terms of Service and
Acceptable Use Policy to review our policies about abuse and fraudulent or illegal activity.
Report spam
Squarespace Domains LLC and Squarespace Domains II LLC are committed to providing a safe and trusted service. If you have a concern about a domain name registered with Squarespace, you can submit a report to let us know.
Spam encompasses any unsolicited bulk emails sent without the recipient's consent. This includes “spamvertising” and sending emails that violate the
CAN-SPAM Act.
To learn more about reporting other suspicious domain activity to Squarespace, visit
Reporting domain name abuse.
Before you begin:
• Ensure the domain you're reporting to us is
registered and managed through Squarespace.
• Visit our
Terms of Service and
Acceptable Use Policy to review our policies about abuse and fraudulent or illegal activity.
Temporary text
Report Whois contact inaccuracy
Squarespace Domains LLC and Squarespace Domains II LLC are committed to providing a safe and trusted service. If you have a concern about a domain name registered with Squarespace, you can submit a report to let us know.
Domain owners are required to keep their Whois records up-to-date. Inaccurate, outdated or intentionally false domain contact details can be reported through this form.
To learn more about reporting other suspicious domain activity to Squarespace, visit
Reporting domain name abuse.
Before you begin:
• Ensure the domain you're reporting to us is
registered and managed through Squarespace.
• Visit our
Terms of Service and
Acceptable Use Policy to review our policies about abuse and fraudulent or illegal activity.
Squarespace respects intellectual property rights and expects its users to do the same. Squarespace responds expeditiously to claims of trademark infringement committed using the Services. To submit a notice of claimed trademark infringement, you will need to submit a notice of infringement using the form below.
Please be aware that in instances where Squarespace is merely the Registrar and does not provide web hosting services, Squarespace does not control the content and the content does not reside on Squarespace’s servers; you will need to resolve the claimed trademark infringement directly with the site owner or the web hosting service provider.
Squarespace's response to notices of alleged trademark infringement may include the removal or restriction of access to allegedly infringing material. Please note that information provided in a notice of trademark infringement may be forwarded to the user who posted the allegedly infringing content or the site owner.
Please complete all required fields.
#
#
Squarespace Scheduling is now officially Acuity Scheduling. For help setting up appointments, search “Acuity”, or find related guides under “Acuity Scheduling”.
#
#
Please use this form to submit a request regarding a deceased Squarespace customer’s site or Acuity Scheduling account. Our deepest condolences go out to you and your family during this time, and we appreciate your patience as we work through your request.
Due to privacy concerns and restrictions, we unfortunately can't provide you with administrative control of the site. However, if an immediate family member or legal representative completes the form below, we may be able to grant Billing permissions so the site can remain active or cancel any active subscriptions.
Note that Billing permissions don't include the ability to edit the site's content. You can read more about this
here.
A note regarding Squarespace 5 sites:
Squarespace 5, our legacy platform, doesn't allow permissions to be edited. However, we can cancel or remove the site.
A note regarding Acuity Scheduling accounts:
Granting billing permissions is not possible on Acuity accounts without a Squarespace login. However, we can cancel or remove the account.
Submit a request about a deceased customer's account
Subject
Any comments, requests, or concerns we should know?
Please attach the following documents:
• An image of your government-issued ID, such as a driver’s license, passport, military ID, or permanent resident card. This is for proof of your relationship to the deceased.
• An image of the deceased person’s obituary, death certificate, and/or other documents.
• Any additional documents, such as Legal Representation documentation.
Send us a message. Business hours are Monday - Friday, 5:30AM to 8PM EST. Messages sent outside these hours will receive a response within 12 hours.
Monday - Friday:
4:00AM to 8:00PM EST
Squarespace Help Center
Find answers and resources
See More Results
Browse by product
Websites
Adding content with blocks
Formatting your images for display
Changing colors
SEO checklist
Domains
Connecting a domain
Moving a domain to another site
Google Domains migration to Squarespace
Transferring a domain
Commerce
Adding products to your store
Connecting a payment processor
Creating discounts
Setting up taxes
Email Campaigns
Building mailing lists
Creating sender profiles
Email campaign best practices
Getting started with Squarespace Email Campaigns
Google Workspace
Using Google Workspace with Squarespace
Adding more Google Workspace users
Signing up for Google Workspace
Renaming a Google Workspace user
Acuity Scheduling
Adding Acuity to your website
Starting an Acuity Scheduling trial
Creating and editing appointment types
Acuity Scheduling FAQ
Acuity Help Center
What is Acuity Scheduling?
Acuity Scheduling pricing, billing, and invoices
Member Areas
Creating gated content
Customizing the Member Areas experience
Managing members
Getting started with Member Areas
Guides by topic
Show more
Show less
Getting started
Everything you need to start and launch your site on Squarespace
Account
Analytics
Get help with your account settings, password, and site contributors
Billing
View reports to gain insight into visitor engagement and sales
Get help with your plans, payments, and subscriptions
Commerce
Learn how to set up, manage, and grow your online store
Domains
Get step-by-step help with registering, transferring, and connecting domains
Google Workspace and custom email
Images and videos
Set up a custom email address with your domain
Make your site stand out with images, videos, and banners
Integrations and extensions
Add third-party integrations to help you manage, optimize, and expand your site
Marketing
Spread the word about your business with Squarespace’s all-in-one marketing tools
Pages and content
Privacy and security
Learn how to build and edit your site with pages, sections, and blocks
SEO
Get information about security, SSL, data privacy, and policies about Squarespace
Learn how to optimize your site for search engines with the best keywords and content
Acuity Scheduling
Book and manage appointments with integrated online booking
Technical issues and contact us
Troubleshoot technical and speed issues with your site
Templates and design
Learn how to customize fonts, colors, and other design features
Learn by video
All About Images
7 videos
Introducing Commerce
4 videos
Build your first Squarespace site
1 video
Your Pages & Navigation
7 videos
See all videos
Community forums
Join our active community of Squarespace users and professionals for advice, inspiration, and best practices.
Squarespace Forum
Squarespace webinars
Circle Forum
Free online sessions where you'll learn the basics and refine your Squarespace skills. Everyone is welcome—no website required.
Upcoming Webinars
Hire an Expert with Marketplace
Squarespace Experts can help you polish an existing site, or build a new one from scratch.
Browse Experts
Can't find what you're looking for?
We'll help you find an answer or connect you with Customer Support through live chat or email.
Contact Us
No results
Digital Products
Getting started with Digital Products
Paywalls and Pricing plans
Course pages
Member sites
A person holding a smart phone and looking at Colima's website
A Squarespace website example
A sample domain name for a Squarespace website
A screenshot of Google Workspace toolbar
A screenshot of the Commerce product in the Squarespace platform
A sample imagery for sending email campaigns
A screenshot of the Acuity product in the Squarespace platform
A screenshot of the member area product in the Squarespace platform
An abstract photo of shapes and colors
A pair of white shoes
An iPad showcasing an e-commerce website built with Squarespace
A person holding a smart phone and looking at a website built with Squarespace
A screenshot of editing tools on the Squarespace platform
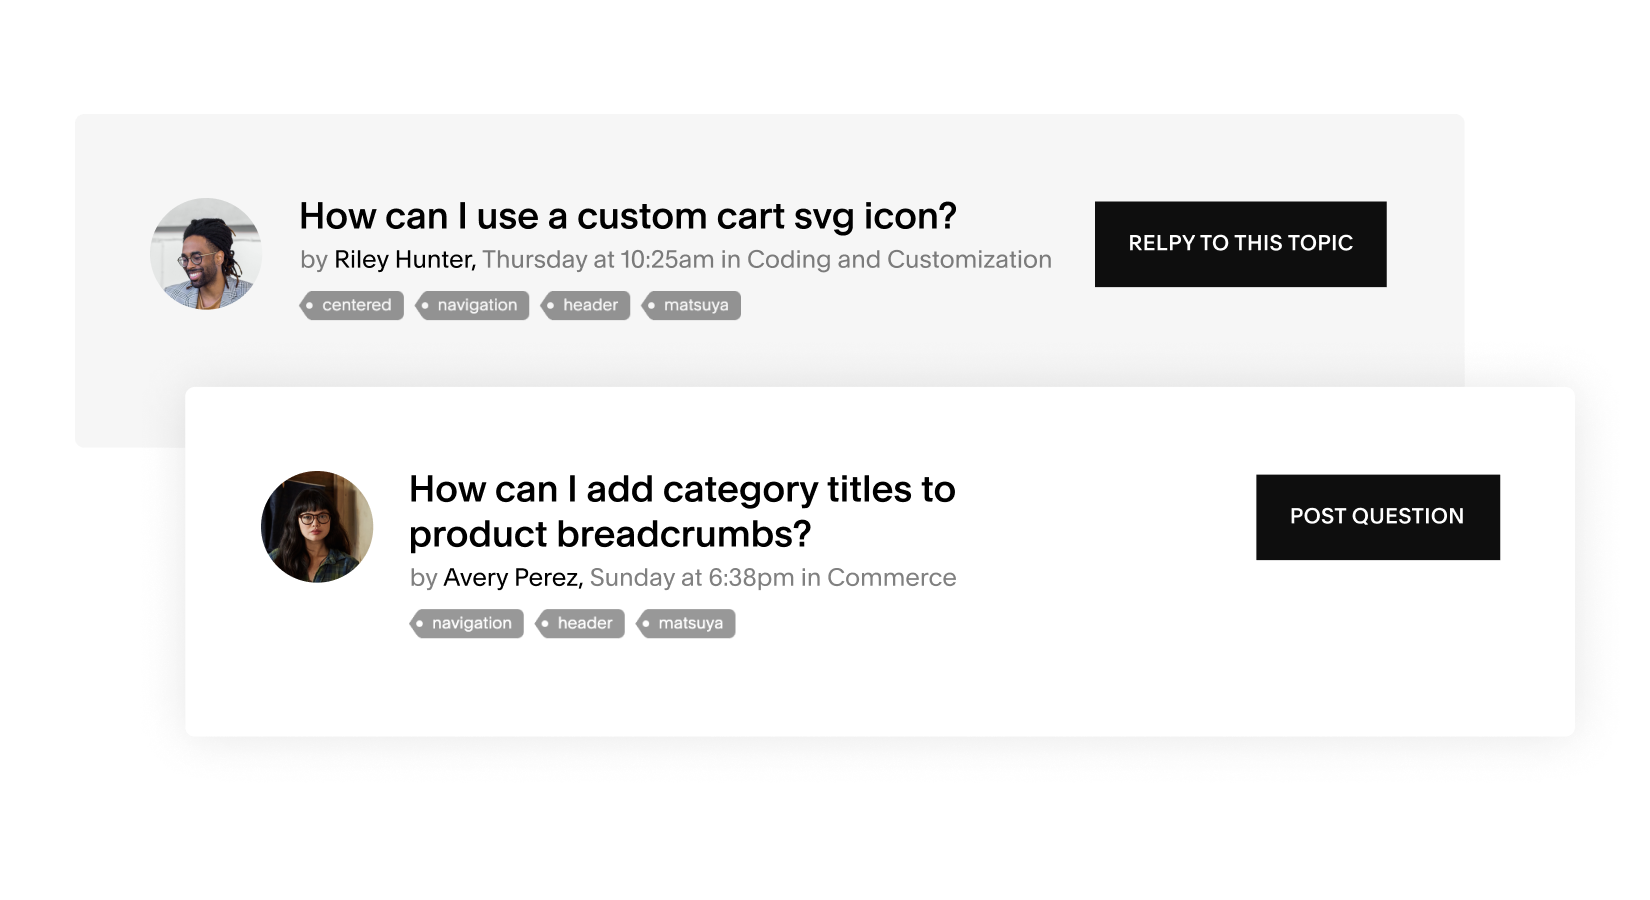
Examples of questions in the Squarespace Community Forum
An example of a Squarespace Expert's bio
A Squarespace website with the Squarespace Customer Service Chatbot open on the screen
Close
How would you rate your experience with the Help Center?
Somewhat dissatisfied
Very dissatisfied
Neither satisfied nor dissatisfied
Somewhat satisfied
Feedback
Very satisfied
Next
Can you tell us why? (Optional)
How was your experience looking for help today?
Very difficult
Somewhat difficult
Neither easy nor difficult
Somewhat easy
Very easy
Why's that? (Optional)
I'm not sure
Did you find the answer you were looking for in the Help Center?
No, my issue was not resolved
I found it elsewhere
Yes, partially
Yes, completely
Where did you best find your answer?
Select
Video
Guide
Webinars
Forum
Other
Thanks for your feedback
Can’t download the transcript. Please try again.
We use machine translation to translate guides in this language. Human editors don’t review the content for quality after it’s translated.
Read the English version
Acuity Scheduling
Can’t log in?
I don’t have an account
Log in
Log into your account so we can customize your experience.
Which account do you need help with today?
Community Forum
Get help from our community on advanced customizations.
Explore the Forum
Webinars
Sign up for an interactive session where our experts walk you through Squarespace basics.
Join a Webinar
Can't find what you're looking for?
We'll help you find the answer or connect with an advisor.
Contact Us
Get help from our community
Get help from our community on advanced customizations.
search in the forums
Hire a Squarespace Expert
Stand out online with the help of an experienced designer or developer.
get matched
In this guide
Was this guide helpful?
People also viewed
Accessing this feature
Note
Tip
Warning
Did you find the information you were looking for?
Still Browsing
Thank you for your feedback.
Error copying text to clipboard
Successfully copied text to clipboard
Copy
In this guide
Your form was submitted successfully!
A confirmation email has been sent to your address. We will get back to you as soon as we can.
return to Squarespace
Can’t find what you need? Here’s how to contact us.
Email Us
Live Chat
Send us a message and read our answer when it’s convenient for you.
Real-time conversations and immediate answers from our award-winning Customer Support team.
24 hours a day
7 days a week
Monday to Friday
4am to 8pm EST
Monday to Friday
4am to 8pm EDT
send an email
start live chat
Live chat currently unavailable.
{"schedules":[{"id":50095,"name":"Business Hours","time_zone":"Eastern Time (US & Canada)","created_at":"2014-10-03T22:10:16Z","updated_at":"2025-01-06T14:24:27Z","intervals":[{"start_time":1200,"end_time":1440},{"start_time":1440,"end_time":2880},{"start_time":2880,"end_time":4320},{"start_time":4320,"end_time":5760},{"start_time":5760,"end_time":7200},{"start_time":7200,"end_time":8400}]},{"id":360000418191,"name":"Social Team Hours","time_zone":"Eastern Time (US & Canada)","created_at":"2020-09-01T09:34:47Z","updated_at":"2020-09-03T13:07:03Z","intervals":[{"start_time":240,"end_time":1440},{"start_time":1680,"end_time":2880},{"start_time":3120,"end_time":4320},{"start_time":4560,"end_time":5760},{"start_time":6000,"end_time":7200},{"start_time":7440,"end_time":8640},{"start_time":8880,"end_time":10080}]},{"id":360000421112,"name":"Account Management VIP Hours","time_zone":"Eastern Time (US & Canada)","created_at":"2020-09-29T20:18:51Z","updated_at":"2021-03-03T10:38:13Z","intervals":[{"start_time":1440,"end_time":2880},{"start_time":2880,"end_time":4320},{"start_time":4320,"end_time":5760},{"start_time":5760,"end_time":7200},{"start_time":7200,"end_time":8640}]},{"id":5995548166541,"name":"Live Chat Business Hours","time_zone":"Eastern Time (US & Canada)","created_at":"2022-05-04T15:10:42Z","updated_at":"2025-02-03T14:00:47Z","intervals":[{"start_time":1680,"end_time":2640},{"start_time":3120,"end_time":4080},{"start_time":4560,"end_time":5520},{"start_time":6000,"end_time":6960},{"start_time":7440,"end_time":8400}]},{"id":5995587746445,"name":"Live Chat AUS/NZ Hours","time_zone":"Eastern Time (US & Canada)","created_at":"2022-05-04T15:12:38Z","updated_at":"2025-02-03T14:01:09Z","intervals":[{"start_time":1200,"end_time":1440},{"start_time":1440,"end_time":2880},{"start_time":2880,"end_time":4320},{"start_time":4320,"end_time":5760},{"start_time":5760,"end_time":7200},{"start_time":7200,"end_time":8400}]},{"id":18405093826701,"name":"[Inactive] Live Chat Acuity Hours","time_zone":"Eastern Time (US & Canada)","created_at":"2023-08-10T16:06:56Z","updated_at":"2024-04-29T14:57:38Z","intervals":[{"start_time":1680,"end_time":2610},{"start_time":3120,"end_time":4050},{"start_time":4560,"end_time":4920},{"start_time":5220,"end_time":5340},{"start_time":5400,"end_time":5490},{"start_time":6000,"end_time":6360},{"start_time":6420,"end_time":6600},{"start_time":6660,"end_time":6780},{"start_time":6840,"end_time":6930},{"start_time":7440,"end_time":8370}]},{"id":21322019776781,"name":"Email - IntouchCX (COSO-3757)","time_zone":"Eastern Time (US & Canada)","created_at":"2023-11-14T14:54:21Z","updated_at":"2024-04-29T14:59:04Z","intervals":[{"start_time":960,"end_time":1440},{"start_time":1440,"end_time":2880},{"start_time":2880,"end_time":4320},{"start_time":4320,"end_time":5760},{"start_time":5760,"end_time":7200},{"start_time":7200,"end_time":7980}]},{"id":21322160612877,"name":"Email - 24/7 teams (COSO-3757)","time_zone":"Eastern Time (US & Canada)","created_at":"2023-11-14T14:59:39Z","updated_at":"2024-04-29T14:59:13Z","intervals":[{"start_time":0,"end_time":1440},{"start_time":1440,"end_time":2880},{"start_time":2880,"end_time":4320},{"start_time":4320,"end_time":5760},{"start_time":5760,"end_time":7200},{"start_time":7200,"end_time":8640},{"start_time":8640,"end_time":10080}]},{"id":25217370917901,"name":"Product Support Business Hours","time_zone":"Eastern Time (US & Canada)","created_at":"2024-03-21T17:12:42Z","updated_at":"2024-05-07T11:37:22Z","intervals":[{"start_time":1620,"end_time":2700},{"start_time":3060,"end_time":4140},{"start_time":4500,"end_time":5580},{"start_time":5940,"end_time":7020},{"start_time":7380,"end_time":8460}]},{"id":26294188481165,"name":"Live Chat - Acuity CUSU HVCS (COSO-4219)","time_zone":"Eastern Time (US & Canada)","created_at":"2024-04-29T14:59:37Z","updated_at":"2025-02-03T14:01:17Z","intervals":[{"start_time":1680,"end_time":2640},{"start_time":3120,"end_time":4080},{"start_time":4560,"end_time":5520},{"start_time":6000,"end_time":6960},{"start_time":7440,"end_time":8400}]},{"id":28799929362829,"name":"Live Chat - Acuity","time_zone":"Eastern Time (US & Canada)","created_at":"2024-07-29T17:52:26Z","updated_at":"2025-02-03T14:01:24Z","intervals":[{"start_time":1680,"end_time":2640},{"start_time":3120,"end_time":4080},{"start_time":4560,"end_time":5520},{"start_time":6000,"end_time":6960},{"start_time":7440,"end_time":8400}]},{"id":30299777743117,"name":"New schedule","time_zone":"Paris","created_at":"2024-09-16T17:00:21Z","updated_at":"2024-09-16T17:16:32Z","intervals":[{"start_time":2040,"end_time":2400},{"start_time":3480,"end_time":3840},{"start_time":4920,"end_time":5280},{"start_time":6360,"end_time":6720},{"start_time":7800,"end_time":8160}]}],"url":"https://squarespace.zendesk.com/api/v2/business_hours/schedules"}
Squarespace Payments
Squarespace Payments Product Area
Getting started with Squarespace Payments
Managing payments and payouts with Squarespace Payments
Understanding a negative balance with Squarespace Payments
Managing your Squarespace Payments account
Accepting Payments
Learn how to process transactions when selling your products on Squarespace
Payment Completed
An error occurred while processing your action. Please try again.
Message not delivered. Click to retry.
An error occurred while processing the card.
Please try again or use a different card.
Form not submitted. Click anywhere on the form to retry.
Sync your conversation and continue messaging us through your favorite app.
Be notified when you get a reply.
My conversations
1 minute ago
Just now
{value} minutes ago
1 hour ago
{value} hours ago
Yesterday
MM/DD/YY
{user} sent a message
Someone
{user} sent a file
{user} sent a form
{user} sent an image
{user} filled a form
{user} sent a location request
You
MMMM D YYYY, h:mm A
Reconnecting...
You're back online!
Offline. You will not receive messages.
Couldn’t load conversations.
Change my email
To be notified by email when you get a reply, enter your email address.
Email
Your email address
Please submit a valid email address.
Submit
Load more
Retrieving history...
Max file size limit exceeded ({size})
This entry is required
Unsupported file type.
Email is invalid
Must contain at least ({characters}) characters
Must contain no more than ({characters}) characters
Choose one...
This doesn't look quite right
To talk to us using email just send a message to our email address and we'll reply shortly:
How can we help?
Click to reload image.
Click to view {size} image.
Type a message...
Preview not available.
Message us below or from your favorite app.
Press Enter for each item
An error occurred when attempting to generate a link for this channel. Please try again.
To talk to us using LINE, scan this QR code using the LINE app and send us a message.
Sync your conversation
Your browser does not support location services or it’s been disabled. Please type your location instead.
This website cannot access your location. Please type your location instead.
Could not send location
This website cannot access your location. Allow access in your settings or type your location instead.
An error occured while sending your message. Please try again.
({count}) New messages
{value}d ago
({count}) New message
Just now
{value}m ago
{value}h ago
Delivered
h:mm A
Seen
Max message size limit exceeded ({size}).
Sending...
Sync this conversation by connecting to your favorite messaging app to continue the conversation your way.
Connect your Facebook Messenger account to be notified when you get a reply and continue the conversation on Facebook Messenger.
New Conversation
Other Channels
Connected
Hi there 👋\nTo start off, we'd like to know a little bit more about you:
Connected as {username}
Your name
Email
Type your name...
Thanks for that! What can we help you with?
name@company.com
Send
You'll be notified here and by email at {email} once we reply.
Settings
Location
Cancel
We were unable to communicate with this number. Try again or use a different one.
Connect your SMS number to be notified when you get a reply and continue the conversation over SMS.
Change my number
Check your messages at {number} to confirm your phone number.
Please submit a valid phone number.
Send
Link to {appUserNumber} was cancelled.
Pending
Start Texting
There was an error sending a message to your number.
Send me a text
A connection for that number was requested recently. Please try again in 1 minute.
A connection for that number was requested recently. Please try again in {minutes} minutes.
Sync conversation
Something went wrong. Please try again.
Message not delivered. Tap to retry.
Form not submitted. Tap anywhere on the form to retry.
Connect your Telegram account to be notified when you get a reply and continue the conversation on Telegram
Unsupported message type.
Unsupported action type.
File
Invalid file.
Image
A virus was detected in your file and it has been rejected
Connect your Viber account to be notified when you get a reply and continue the conversation on Viber. To get started, scan the QR code using the Viber app.
Connect your Viber account to be notified when you get a reply and continue the conversation on Viber. To get started, install the Viber app and tap Connect.
An error occurred while fetching your Viber QR code. Please try again.
Connect your WeChat account to be notified when you get a reply and continue the conversation on WeChat. To get started, scan this QR code using the WeChat app.
An error occurred while fetching your WeChat QR code. Please try again.
Connect your WeChat account to be notified when you get a reply and continue the conversation on WeChat. To get started, save this QR code image and upload it
QR code scanner.
Sync your account to WhatsApp by scanning the QR code or clicking the link below.\nThen, send the pre-populated message to validate the sync request. (Your code: {{code}}).
Sync your account to WhatsApp by clicking the link below.\nThen, send the pre-populated message to validate the sync request. (Your code: {{code}}).
An error occurred while fetching your WhatsApp linking information. Please try again.
Chat wait times are longer right now due to a high volume of requests. The fastest way to connect to a member of our Support team is to stay in this chat.
You don't have to wait in the chat queue to get a response. I’ll send your transcript to our team. We'll respond via email as soon as we can.
You'll be leaving the live chat queue and losing your place in line. You can re-enter the queue at any time by starting a new live chat.
No mode found
Waiting for an agent...
Send an email instead?
Cancel chat request?
Cancel Chat
Send Email
Confirm
Send an email instead
Continue waiting
Squarespace Assistant
View Queue Status
Live chat support for this language is currently offline.
Chatbot not working?
Report it to our team.
Hi
let's get you the help you need.
Our automated Support Assistant will work with you to try to find a quick answer.
Want to talk to a human? The Support Assistant can connect you with a member of our team through live chat or email.
contact us
Ways to get help
Start with our automated Support Assistant
Get quick answers from our chatbot any time. Type your question and you'll get immediate guidance.
Email or chat with our support team
Need more help? Our Support Assistant will connect you to an Advisor on our Customer Support team.
Let's get you the help you need.
For faster support, please log in.
Live chat is not available.
Chat in English
Live Chat
Live chat is not available right now. Please send us an email and we'll respond within 12 hours.
Live chat is not available in your language right now. Chat with us in English, or send us an email and we'll respond within 12 hours.
Live chat is available in your language Monday-Friday, from 10:00 AM to 4:00 PM CET.
Live chat is not available in your language. Please send us an email and we'll respond within 12 hours.
Live chat is not available in your language. Chat with us in English, or send us an email and we'll respond within 12 hours.
Real-time conversations and immediate responses from our award-winning Customer Support Team. Monday-Friday: 10:00 AM to 4:00 PM CET
Live chat is not available right now. Please send us an email and we'll respond within 12 hours.
Live chat is available in your language Monday-Friday, from 10:00 AM to 4:00 PM CET.
Skip To Chat

 beside your store page.