検索結果
すべてのカテゴリー
クリア
検索
適用
次で検索:
カテゴリー
リセット
フィルター条件
前へ
次へ
ガイド
ログアウト
アカウント ダッシュボード
使用言語をお選びください
動画
https://learning.squarespace.com
ウェビナー
https://forum.squarespace.com
フォーラム
/hc/requests/new#choose-topic
お問い合わせ
ライブ チャット: クローズ済み
ライブ チャット: オープン
ログイン
すべての結果を表示
送信
トピックを選択する
これは次の点で役立つと考えられます。
引き続きお問い合わせが必要ですか?
リアルタイムで会話し、すぐに回答を得ることができます。
ライブ チャット
月曜日から金曜日:
午前4 時から午後8 時 (米国東部標準時)
メッセージを送信し、ご都合のいいときに回答をお読みください。
メール
このトピックに関するサポートが必要な場合は、メールでお問い合わせください。
24時間
週 7日対応可
Squarespaceにログイン
戻る
このガイドには日本語版がありません。5秒後にリダイレクトされます
現在、ライブ チャット サポートは英語でのみ提供されています。
スペイン語のメール サポート
英語のチャット
Squarespace5ヘルプ
従来のSquarespace5プラットフォームについて質問がある場合は、以下のヘルプ センターをご覧ください。
戻る
アカウントまたはサイトへのアクセスを回復する
SquarespaceまたはAcuityアカウントを回復しようとしたにもかかわらずアクセスできない場合は、当社がお手伝いいたします。できるだけ多くの情報をご入力ください。具体的な詳細がわからない場合は、推測でも構いません。
開始する前に、次のことを確認してください:
• すでにログイン ページからアカウントの復旧をお試しになりましたか?まだの場合は、まずお試しください。
• セキュリティ上の理由から、アカウントの詳細はアカウント所有者にのみ提供されます。
•Google Workspaceアカウントの復旧については、こちらからお問い合わせください。
Squarespaceとの連絡に使用するメールアドレス。
どのような状況でアカウントへのアクセスに問題が発生しましたか?
アカウントに接続されているWebサイトのURL。できるだけ多くのドメインをご入力ください。
以下の書類の両方を添付してください。
• 政府発行の身分証明書 (運転免許証、パスポート、永住権カードなど)。
• 銀行のヘッダー、銀行口座の名義、Squarespaceの直近の請求が記載された銀行取引明細書。その他の個人情報は隠しても構いません (2要素認証の問題には必要ありません)。
注:
• 上記で複数のWebサイトを入力した場合は、すべてのサイトに関連する直近の料金が記載された明細書を添付してください。
• 当社で確認できるファイル形式 (.jpgまたは.png) であることをご確認ください。
アカウント アクセスをリクエストする
次の手順を実施してください。
詳細を確認
返金をリクエストする
2 営業日以内に返信します。
免税証明書をお持ちの場合は、こちらに添付してください。添付可能なファイル形式は.pdf、.png、.jpegです。
このフォームを使用して、Squarespace Paymentsについて徴収される売上税の免除に関するリクエストを送信してください。
リクエストの詳細をこちらにご入力ください。お客様が当社の税金徴収対象の国または州に拠点を置いておらず、当社による税金の徴収が行われるべきではないとお考えの場合は、その旨をご説明ください。
売上税の徴収方法についてフィードバックがある場合は、ここから送信してください。
お客様のフィードバックは�Squarespaceの改善に役立ちます。当社では、受け取ったすべてのリクエストに目を通しています。個別の返信は控えさせていただきますが、さらなる情報が必要な場合はご連絡いたします。
一般的な売上税のフィードバック
売上税の免除をリクエストする
もっと詳しく
発生している問題、または変更したいサイト コンテンツのスクリーンショットをアップロードしていただくと、アドバイザーがより迅速に対応できるようになります。スクリーンショットの撮り方については、こちらをご覧ください:
https://sqsp.link/hMaBjwSquarespaceは知的財産権を尊重しており、ユーザーにも同様に知的財産権を尊重することが期待されます。Squarespaceは、本サービスに関わる著作権侵害の申し立てに迅速に対応します。
著作権侵害の申し立ての通知を提出するには、以下のフォームを使用する必要があります。
Squarespaceがレジストラーとしての役割のみを果たし、Webホスティング サービスを提供していない場合には、Squarespaceがコンテンツを管理することはなく、コンテンツは�Squarespaceのサーバー上に存在しない点にご注意ください。このような場合、サイト所有者またはWebホスティングのサービス プロバイダーと直接やり取りをして著作権侵害の申し立てを解決する必要があります。
著作権侵害の申し立ての通知に対する�Squarespaceの対応には、侵害の申し立てのある素材の削除、または、その素材に対するアクセスの制限が含まれる場合があります。著作権侵害の申し立ての通知により提供された情報は、侵害の申し立てのあるコンテンツを投稿したユーザーまたはサイト所有者に転送される場合があることにご注意ください。
Squarespaceは、安全で信頼できるサービスをお客様に提供することに尽力しています。Squarespace上に違法なコンテンツが存在すると思われる場合は、以下のフォームを使用してSquarespaceに報告してください。この報告チャネルは、欧州連合のデジタル サービス法 (規則 (EU) 2022/2065) (「DSA」) 第16条に従って導入されました。
マルウェアを報告する
Squarespace Domains LLCおよびSquarespace Domains II LLCは、安全で信頼できるサービスの提供に努めています。Squarespaceで登録したドメイン名について懸念がある場合は、レポートを提出してお知らせください。
マルウェア (悪意のあるソフトウェア) とは、コンピューターを混乱させたり、損傷させたり、所有者が知らないうちにコンピューターにアクセスしたりするように設計されたプログラムのことです。マルウェアには、ウイルス、スパイウェア、ランサムウェア、その他の不正なソフトウェアが含まれます。複数のソースを介して使用されるマルウェアは、ボットネットと呼ばれます。
その他の不審なドメイン アクティビティをSquarespaceに報告する方法の詳細については、「
ドメイン名の不正使用を報告する」をご参照ください。
始める前に:
• 報告するドメインが
Squarespaceを介して登録および管理されていることをご確認ください。
• 不正使用や詐欺行為、違法行為に関する当社のポリシーについては、当社の
サービス利用規約および
禁止事項ポリシーをご覧ください。
フィッシングまたはファーミングを報告する
Squarespace Domains LLCおよびSquarespace Domains II LLCは、安全で信頼できるサービスの提供に努めています。Squarespaceで登録したドメイン名について懸念がある場合は、レポートを提出してお知らせください。
フィッシングとは詐欺の一種で、ユーザーを騙してクレジットカード情報、パスワード、アカウント情報などの機密情報を共有させようとするものです。
フィッシングがユーザーを騙して機密情報を共有させようとするのに対し、ファーミングの場合は、ユーザーが最初にアクセスしようとした場所ではなく、改ざん/ハイジャックされたDNSを介してユーザーを詐欺サイトにリダイレクトしようとします。
その他の不審なドメイン アクティビティをSquarespaceに報告する方法の詳細については、「
ドメイン名の不正使用を報告する」をご参照ください。
始める前に:
• 報告するドメインが
Squarespaceを介して登録および管理されていることをご確認ください。
• 不正使用や詐欺行為、違法行為に関する当社のポリシーについては、当社の
サービス利用規約および
禁止事項ポリシーをご覧ください。
スパムを報告する
Squarespace Domains LLCおよびSquarespace Domains II LLCは、安全で信頼できるサービスの提供に努めています。Squarespaceで登録したドメイン名について懸念がある場合は、レポートを提出してお知らせください。
スパムとは、受信者の同意なしに送信される大量の迷惑メールのことです。これには、「スパム広告」や
CAN-SPAM 法に違反するメール送信が含まれます。
その他の不審なドメイン アクティビティをSquarespaceに報告する方法の詳細については、「
ドメイン名の不正使用を報告する」をご参照ください。
始める前に:
• 報告するドメインが
Squarespaceを介して登録および管理されていることをご確認ください。
• 不正使用や詐欺行為、違法行為に関する当社のポリシーについては、当社の
サービス利用規約および
禁止事項ポリシーをご覧ください。
一時的なテキスト
WHOIS連絡先の不正確さを報告する
Squarespace Domains LLCおよびSquarespace Domains II LLCは、安全で信頼できるサービスの提供に努めています。Squarespaceで登録したドメイン名について懸念がある場合は、レポートを提出してお知らせください。
ドメイン所有者は、WHOISレコードを最新の状態に保つことが求められます。正確でない、古い、または意図的な虚偽のドメインの連絡先に関しては、このフォームから詳しく報告することができます。
その他の不審なドメイン アクティビティをSquarespaceに報告する方法の詳細については、「
ドメイン名の不正使用を報告する」をご参照ください。
始める前に:
• 報告するドメインが
Squarespaceを介して登録および管理されていることをご確認ください。
• 不正使用や詐欺行為、違法行為に関する当社のポリシーについては、当社の
サービス利用規約および
禁止事項ポリシーをご覧ください。
Squarespaceは知的財産権を尊重しており、当社のサービスのユーザーにも同様に知的財産権を尊重することが期待されます。Squarespaceは、本サービスに関わる商標権侵害の申し立てに迅速に対応します。商標権侵害の申し立ての通知を提出するには、下記のフォームを使用する必要があります。
Squarespaceがレジストラーとしての役割のみを果たし、Webホスティング サービスを提供していない場合には、Squarespaceがコンテンツを管理することはなく、コンテンツは�Squarespaceのサーバー上に存在しない点にご注意ください。このような場合、お客様は、サイト所有者またはWebホスティングのサービス プロバイダーと直接やり取りをして商標権侵害の申し立てを解決する必要があります。
商標権侵害の申し立ての通知に対する�Squarespaceの対応には、侵害の申し立てのあった素材の削除、または、その素材に対するアクセスの制限が含まれる場合があります。商標権侵害の申し立ての通知により提供された情報は、侵害の申し立てのあるコンテンツを投稿したユーザーまたはサイト所有者に転送される場合があることにご注意ください。
すべての必須フィールドに情報をご入力ください。
#
#
Squarespace Schedulingは正式にAcuity Schedulingに変更されました。アポイントメントの設定に関するサポートが必要な場合は、「Acuity」で検索するか、「Acuity Scheduling」で関連ガイドをお探しください。
#
#
亡くなったSquarespace顧客のサイトまたはAcuity Schedulingアカウントに関するリクエストを送信するには、このフォームを使用してください。この度は、お客様とご家族の皆様に心からお悔やみ申し上げます。ご要望にお応えできるまで今しばらくお待ちください。
プライバシー上の懸念と制限のため、残念ながらサイトの管理者権限をお渡しすることはできません。ただし、近親者または法定代理人が以下のフォームに記入した場合、請求権限を付与してサイトを有効にしたり、有効なサブスクリプションをキャンセルしたりできる場合があります。
請求権限には、サイトのコンテンツを編集する機能は含まれていないことに留意してください。詳細については、
こちらをご覧ください。
Squarespace5サイトに関する注意事項:
レガシー プラットフォームであるSquarespace5では、権限を編集できません。ただし、サイトをキャンセルまたは削除することはできます。
Acuity Schedulingアカウントに関する注意事項:
SquarespaceにログインしていないAcuityアカウントに対しては、請求権限をお渡しすることはできません。ただし、アカウントをキャンセルまたは削除することはできます。
故人のアカウントに関するリクエストを送信する
件名
知っておくべきコメント、リクエスト、または懸念はありますか?
次の書類を添付してください。
• 運転免許証、パスポート、軍人身分証明書、永住者カードなど、政府発行の身分証明書の画像。これは故人との関係の証明書です。
• 故人の死亡記事、死亡診断書、その他の書類の画像。
• 法定代理人を証明する書類などの追加書類
メッセージを送信してください。営業時間は月曜日から金曜日の午前5 時 30分〜午後8 時 (米国東部標準時間) です。この営業時間外に送信されたメッセージには12時間以内に返信いたします。
月曜日から金曜日:
午前4 時から午後8 時 (米国東部標準時)
Squarespaceヘルプ センター
回答やリソースを探す
その他の結果を表示
商品別に見る
Webサイト
ブロックを使用したコンテンツの追加
表示される画像の書式設定を行う
色を変更する
SEOチェックリスト
ドメイン
ドメインを接続する
ドメインを別のサイトに移行する
Google DomainsからSquarespaceへの移管
ドメインの移管
Commerce
ストアに商品を追加する
支払い処理業者への接続
割引の作成
各種税金の設定
メールキャンペーン
メーリングリストの構築
送信者プロフィールの作成
メールキャンペーンのベスト プラクティス
Squarespaceメールキャンペーンを始める
Google Workspace
SquarespaceでGoogle Workspaceを使用する
Google Workspaceユーザーを追加する
Google Workspaceにサインアップする
Google Workspaceユーザーの名前を変更する
Acuity Scheduling
WebサイトにAcuityを追加する
Acuity Schedulingのトライアルを開始する
アポイントメント タイプの作成と編集
Acuity Schedulingに関するよくある質問
Acuityヘルプ センター
Acuity Schedulingとは?
Acuity Schedulingの価格、請求、請求書
メンバー エリア
ゲート付きコンテンツの作成
メンバー エリアのエクスペリエンスをカスタマイズする
メンバーを管理する
メンバー エリアの作成を開始する
トピックごとのガイド
さらに表示
表示を減らす
始める
Squarespaceでサイトを立ち上げるために必要な基本情報を得る
アカウント
分析
アカウント設定、パスワード、サイトの作成者に関するヘルプを得る
請求
レポートを表示して、サイト訪問者のエンゲージメントと売上についての洞察を得る
プラン、お支払い、サブスクリプションに関するヘルプを得る
Commerce
オンラインストアを立ち上げ、管理し、成長させる方法を学ぶ
ドメイン
ドメインの登録、移管、接続に関するステップごとのヘルプを得る
Google Workspaceとカスタム メール
画像と動画
ドメインでカスタム メールアドレスを設定する
画像、動画、バナーを活用してサイトを目立たせる
統合と拡張機能
サードパーティーの統合機能を追加して、サイトの管理、最適化、拡張を行う
マーケティング
Squarespaceのオールインワン マーケティング ツールを使用して自分のビジネスについての情報を広める
ページとコンテンツ
プライバシーとセキュリティ
ページ、セクション、ブロックを使用してサイトの構築や編集を行う方法を学ぶ
SEO
Squarespaceのセキュリティ、SSL、データ プライバシー、ポリシーに関する情報を入手する
最適なキーワードとコンテンツを使用して検索エンジン向けにサイトを最適化する方法を学ぶ
Acuity Scheduling
統合されたオンライン予約機能でアポイントメントを作成・管理する
技術的な問題とお問い合わせ
サイトの技術的な問題や速度に関するトラブルシューティングを行う
テンプレートとデザイン
フォント、色、その他のデザイン機能をカスタマイズする方法を学ぶ
動画で学ぶ
画像に関するすべて
7件の動画
Squarespace Commerceの紹介
4件の動画
初めてのSquarespaceサイトを構築
1件の動画
ページとナビゲーション
7件の動画
すべての動画を見る
コミュニティ フォーラム
Squarespaceユーザーと専門家の活気溢れるコミュニティに参加して、アドバイス、インスピレーション、ベスト プラクティスを得ましょう。
Squarespace Forum
Squarespaceウェビナー
Circleフォーラム
基本情報を学び、Squarespaceでのスキルを磨く無料のオンライン セッションです。どなたでも参加でき、Webサイトは必要ありません。
近日開催のウェビナー
Marketplaceで専門家を雇う
Squarespace Expertが、お客様の既存のサイトのブラッシュアップや、新しいサイトの一からの構築をお手伝いします。
専門家を探す
お探しの情報が見つかりませんか?
解決策を探すのをお手伝いするか、カスタマー サポートに繋いでチャットやメールでサポートします。
お問い合わせ
結果がありません
デジタル商品
デジタル商品の販売を始める
ペイウォールと料金プラン
コース ページ
メンバー サイト
スマートフォンでColimaのWebサイトを見る人物
Squarespaceサイトの例
Squarespaceサイトのドメイン名のサンプル
Google Workspaceツールバーのスクリーンショット
Squarespaceプラットフォームのコマース 商品のスクリーンショット
メールキャンペーン送信のサンプル画像
SquarespaceプラットフォームのAcuity商品のスクリーンショット
Squarespaceプラットフォームのメンバー エリア商品のスクリーンショット
図形と色の抽象的な写真
白い靴
Squarespaceで構築されたeコマースのWebサイトをiPadで紹介する様子
Squarespaceで構築されたWebサイトをスマートフォンで見る人
Squarespaceプラットフォーム上の編集ツールのスクリーンショット
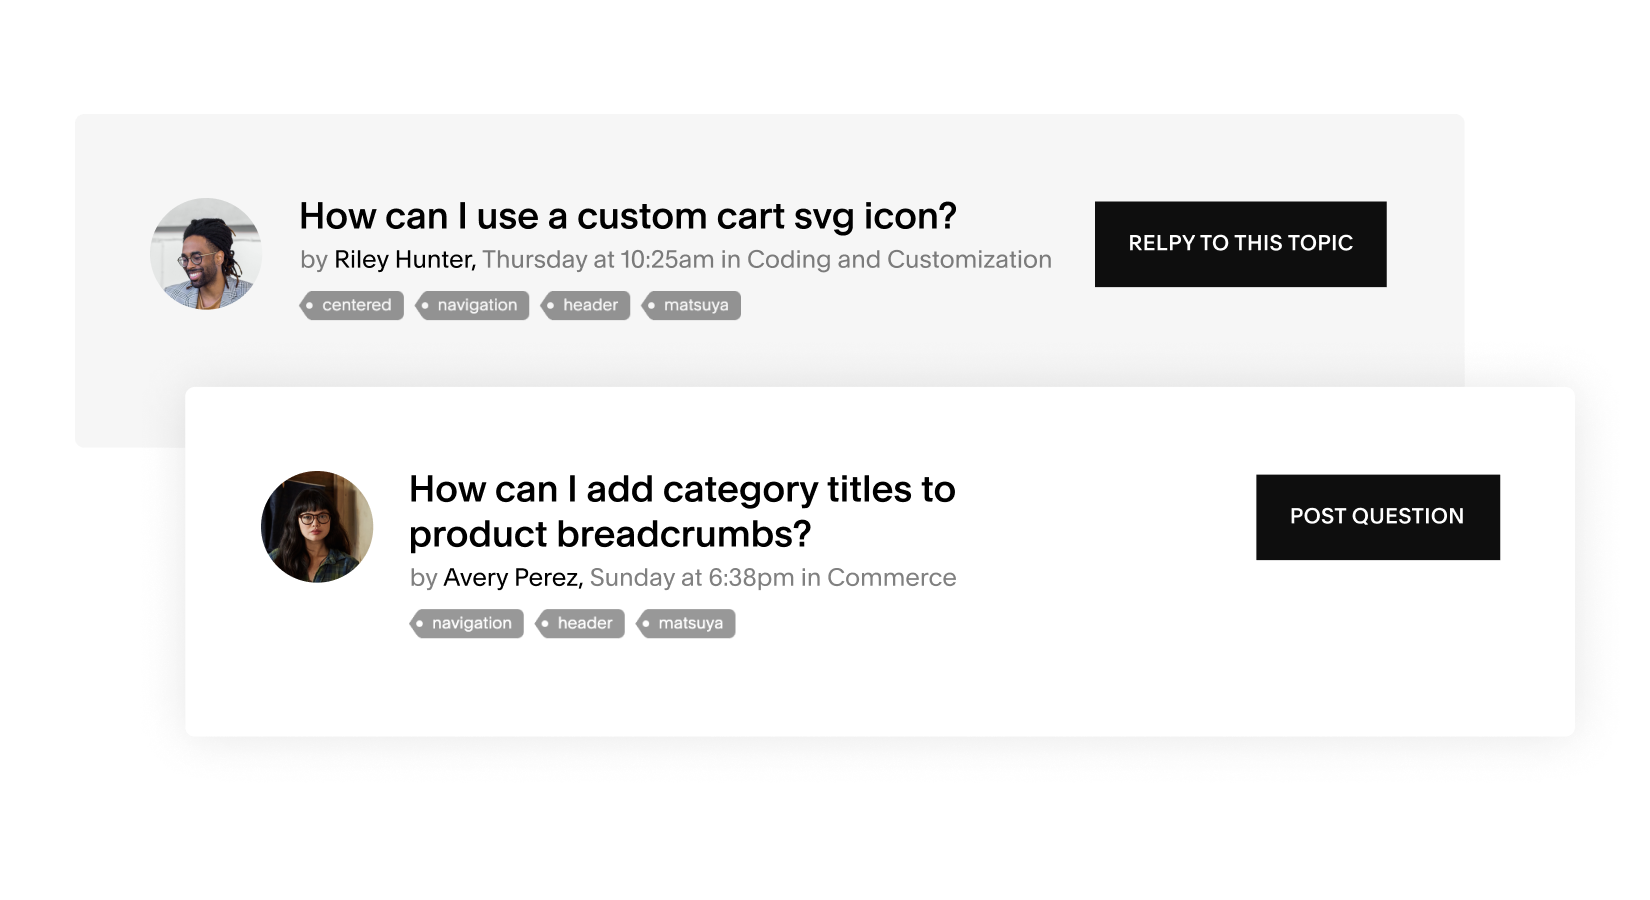
Squarespaceコミュニティ フォーラムでの質問の例
Squarespace Expertのプロフィールの例
Squarespaceカスタマー サービス チャットボットが画面上で開いている�SquarespaceのWebサイト
閉じる
ヘルプ センターの使用体験を評価してください。
どちらかというと不満がある
非常に不満がある
どちらでもない
どちらかというと満足している
フィードバック
非常に満足している
次へ
その理由をお聞かせください。(任意)
本日サポートを利用されていかがでしたか?
非常に難しい
どちらかというと難しい
どちらでもない
どちらかというと分かりやすい
非常に分かりやすい
理由をお聞かせください。(任意)
よく分からない
お探しの回答はヘルプ センターで見つかりましたか?
問題は解決されなかった
別の場所で見つけた
はい、部分的に同意します
はい、完全に同意します
探していた回答をどこで見つけましたか?
選択してください
動画
ガイド
ウェビナー
フォーラム
その他
ご意見ありがとうございます
トランスクリプトをダウンロードできません。再度お試しください。
We use machine translation to translate guides in this language. Human editors don’t review the content for quality after it’s translated.
Read the English version
Acuity Scheduling
ログインできませんか?
アカウントを持っていません
ログイン
アカウントにログインすると、エクスペリエンスをカスタマイズできます。
今回サポートが必要なのは、どのアカウントですか?
コミュニティ フォーラム
高度なカスタマイズについて、コミュニティからサポートを受けられます。
フォーラムを詳しく見る
ウェビナー
当社の専門家が�Squarespaceの基本について説明するインタラクティブなセッションにサインアップしましょう。
ウェビナーに参加する
お探しの情報が見つかりませんか?
回答を見つけたり、アドバイザーに相談できるよう私たちがサポートします。
お問い合わせ
コミュニティからサポートを受ける
高度なカスタマイズについて、コミュニティからサポートを受けられます。
フォーラムで検索する
Squarespace Expertを雇う
経験豊富なデザイナーや開発者から力を借りて、オンラインで目を引くサイトを構築しましょう。
マッチングする
このガイドの内容
このガイドは役に立ちましたか?
他のユーザーが閲覧した内容
この機能へのアクセス
備考
ヒント
警告
お探しの情報は見つかりましたか?
閲覧中
ご意見ありがとうございます。
テキストをクリップボードへコピーする際にエラーが発生しました
テキストがクリップボードに正常にコピーされました
コピー
このガイドの内容
フォームが正常に送信されました。
ご登録のメールアドレスに確認メールが送信されました。できるだけ早く回答いたします。
Squarespaceに戻る
必要な情報が見つかりませんか?お問い合わせ方法は次のとおりです。
メールでのお問い合わせ
ライブ チャット
メッセージを送信し、ご都合のいいときに回答をお読みください。
受賞歴のあるカスタマー サポート チームとリアルタイムで会話し、素早く回答を得ることができます。
24時間
週 7日対応可
月曜日から金曜日
午前4 時から午後8 時(米国東部標準時)
月曜日から金曜日
午前4時から午後8時(米国東部夏時間)
メールを送信
ライブ チャットを開始
ライブ チャットは現在ご利用になれません。
{"schedules":[{"id":50095,"name":"Business Hours","time_zone":"Eastern Time (US & Canada)","created_at":"2014-10-03T22:10:16Z","updated_at":"2025-04-17T16:23:12Z","intervals":[{"start_time":1200,"end_time":1440},{"start_time":1440,"end_time":2880},{"start_time":2880,"end_time":4320},{"start_time":4320,"end_time":5760},{"start_time":5760,"end_time":7200},{"start_time":7200,"end_time":8400}]},{"id":360000418191,"name":"Social Team Hours","time_zone":"Eastern Time (US & Canada)","created_at":"2020-09-01T09:34:47Z","updated_at":"2020-09-03T13:07:03Z","intervals":[{"start_time":240,"end_time":1440},{"start_time":1680,"end_time":2880},{"start_time":3120,"end_time":4320},{"start_time":4560,"end_time":5760},{"start_time":6000,"end_time":7200},{"start_time":7440,"end_time":8640},{"start_time":8880,"end_time":10080}]},{"id":360000421112,"name":"Account Management VIP Hours","time_zone":"Eastern Time (US & Canada)","created_at":"2020-09-29T20:18:51Z","updated_at":"2021-03-03T10:38:13Z","intervals":[{"start_time":1440,"end_time":2880},{"start_time":2880,"end_time":4320},{"start_time":4320,"end_time":5760},{"start_time":5760,"end_time":7200},{"start_time":7200,"end_time":8640}]},{"id":5995548166541,"name":"Live Chat Business Hours","time_zone":"Eastern Time (US & Canada)","created_at":"2022-05-04T15:10:42Z","updated_at":"2025-04-23T20:10:37Z","intervals":[{"start_time":1140,"end_time":1440},{"start_time":1440,"end_time":2880},{"start_time":2880,"end_time":4320},{"start_time":4320,"end_time":5760},{"start_time":5760,"end_time":7020},{"start_time":7440,"end_time":8400}]},{"id":5995587746445,"name":"Live Chat AUS/NZ Hours","time_zone":"Eastern Time (US & Canada)","created_at":"2022-05-04T15:12:38Z","updated_at":"2025-04-23T20:11:19Z","intervals":[{"start_time":1140,"end_time":1440},{"start_time":1440,"end_time":2880},{"start_time":2880,"end_time":4320},{"start_time":4320,"end_time":5760},{"start_time":5760,"end_time":7020},{"start_time":7440,"end_time":8400}]},{"id":18405093826701,"name":"[Inactive] Live Chat Acuity Hours","time_zone":"Eastern Time (US & Canada)","created_at":"2023-08-10T16:06:56Z","updated_at":"2024-04-29T14:57:38Z","intervals":[{"start_time":1680,"end_time":2610},{"start_time":3120,"end_time":4050},{"start_time":4560,"end_time":4920},{"start_time":5220,"end_time":5340},{"start_time":5400,"end_time":5490},{"start_time":6000,"end_time":6360},{"start_time":6420,"end_time":6600},{"start_time":6660,"end_time":6780},{"start_time":6840,"end_time":6930},{"start_time":7440,"end_time":8370}]},{"id":21322019776781,"name":"Email - IntouchCX (COSO-3757)","time_zone":"Eastern Time (US & Canada)","created_at":"2023-11-14T14:54:21Z","updated_at":"2024-04-29T14:59:04Z","intervals":[{"start_time":960,"end_time":1440},{"start_time":1440,"end_time":2880},{"start_time":2880,"end_time":4320},{"start_time":4320,"end_time":5760},{"start_time":5760,"end_time":7200},{"start_time":7200,"end_time":7980}]},{"id":21322160612877,"name":"Email - 24/7 teams (COSO-3757)","time_zone":"Eastern Time (US & Canada)","created_at":"2023-11-14T14:59:39Z","updated_at":"2024-04-29T14:59:13Z","intervals":[{"start_time":0,"end_time":1440},{"start_time":1440,"end_time":2880},{"start_time":2880,"end_time":4320},{"start_time":4320,"end_time":5760},{"start_time":5760,"end_time":7200},{"start_time":7200,"end_time":8640},{"start_time":8640,"end_time":10080}]},{"id":25217370917901,"name":"Product Support Business Hours","time_zone":"Eastern Time (US & Canada)","created_at":"2024-03-21T17:12:42Z","updated_at":"2024-05-07T11:37:22Z","intervals":[{"start_time":1620,"end_time":2700},{"start_time":3060,"end_time":4140},{"start_time":4500,"end_time":5580},{"start_time":5940,"end_time":7020},{"start_time":7380,"end_time":8460}]},{"id":26294188481165,"name":"Live Chat - CUSU & HVCS (COSO-4219)","time_zone":"Eastern Time (US & Canada)","created_at":"2024-04-29T14:59:37Z","updated_at":"2025-04-15T17:34:53Z","intervals":[{"start_time":1980,"end_time":2610},{"start_time":3120,"end_time":4050},{"start_time":4560,"end_time":5490},{"start_time":6000,"end_time":6930},{"start_time":7440,"end_time":8370}]},{"id":28799929362829,"name":"Live Chat - Acuity","time_zone":"Eastern Time (US & Canada)","created_at":"2024-07-29T17:52:26Z","updated_at":"2025-04-15T17:35:02Z","intervals":[{"start_time":1980,"end_time":2640},{"start_time":3120,"end_time":4080},{"start_time":4560,"end_time":5520},{"start_time":6000,"end_time":6960},{"start_time":7440,"end_time":8400}]}],"url":"https://squarespace.zendesk.com/api/v2/business_hours/schedules"}
Squarespace Payments
Squarespace Payments商品エリア
Squarespace Paymentsを始める
Squarespace Paymentsの振込
Squarespace Paymentsのマイナス残高を理解する
Squarespace Paymentsアカウントの管理
Accepting Payments
Squarespaceで商品を販売する際の取引処理方法を学びましょう
支払いが完了しました
アクションの処理中にエラーが発生しました。再度お試しください。
メッセージは送信されませんでした。クリックして再試行してください。
カードの処理中にエラーが発生しました。
再度お試しになるか、別のカードをご利用ください。
フォームは送信されませんでした。フォーム上の任意の場所をクリックすると再試行できます。
会話を同期すれば、お好きなアプリから当社へメッセージを送れます。
返信を受け取ると通知が届きます。
会話履歴
1分前
たった今
{value}分前
1時間前
{value}時間前
昨日
YY/MM/DD
{user}がメッセージを送信しました
匿名ユーザー
{user}がファイルを送信しました
{user}がフォームを送信しました
{user}が画像を送信しました
{user}がフォームに入力しました
{user}が位置情報リクエストを送信しました
自分
YYYY MM DD, hh:mm
再接続中...
オンラインに戻りました。
オフラインです。メッセージを受け取ることはできません。
会話を読み込めませんでした。
メールアドレスを変更する
返信が届いたときにメールで通知を受け取るには、メールアドレスをご入力ください。
メール
使用中のメールアドレス
有効なメールアドレスを送信してください。
送信
さらに読み込む
履歴を取得中...
ファイル サイズの制限 ({size}) を超過しています
この入力は必須です
サポートされていないファイル タイプです。
メールアドレスが無効です
少なくとも({characters})文字を含める必要があります
({characters})文字以下にする必要があります
1つ選択してください...
何か問題が生じているようです
メールで当社に問い合わせされる場合は、当社のメールアドレス宛にメッセージを送信してください。迅速に返信いたします。
どのようなサポートが必要ですか?
クリックして画像を再読み込みします。
クリックすると{size}の画像が表示されます。
メッセージを入力...
プレビューは利用できません。
以下の欄、またはお好きなアプリからメッセージをお送りください。
各項目で Enter キーを押します
このチャネルへのリンクの生成中にエラーが発生しました。再度お試しください。
LINEをご利用の場合は、LINE アプリでこのQR コードを読み取り、当社にメッセージを送信してください。
会話を同期する
お使いのブラウザーは位置情報サービスをサポートしていないか、位置情報が無効になっています。代わりにご自分の位置情報をご入力ください。
このWebサイトは、お客様の位置情報にアクセスできません。代わりにご自分の位置情報をご入力ください。
位置情報を送信できませんでした
このWebサイトは、お客様の位置情報にアクセスできません。設定でアクセスを許可するか、位置情報をご入力ください。
メッセージの送信中にエラーが発生しました。再度お試しください。
({count})件の新着メッセージ
{value}日前
({count})件の新着メッセージ
たった今
{value}分前
{value}時間前
配信済み
hh:mm
既読
メッセージ サイズの制限 ({size}) を超過しています。
送信中...
お好きなメッセージ アプリに接続してこの会話を同期すると、ご自分で選んだ方法で会話を続けることができます。
Facebook Messengerのアカウントを接続すると、返信が届いたときに通知を受け取れるとともに、Facebook Messengerで会話を続けることができます。
新しい会話
その他のチャネル
接続済み
こんにちは👋 まず、お客様についてもう少し詳しく教えてください。
{username}として接続済み
お名前
メールアドレス
お名前をご入力ください...
ありがとうございます。どのようなサポートが必要ですか?
name@company.com
送信
当社からの返信が届くと、このプラットフォームと ({email}) のメールアドレス宛に通知が送信されます。
設定
位置情報
キャンセル
この番号での通信に失敗しました。もう一度やり直すか、別の番号を使用してください。
SMS番号を接続すると、返信が届いたときに通知を受け取れるとともに、SMSで会話を続けることができます。
番号を変更する
お客様の電話番号を認証します。{number}に届いたメッセージをご確認ください。
有効な電話番号を送信してください。
送信
{appUserNumber}へのリンクがキャンセルされました。
保留中
テキストによるメッセージを開始する
お客様の電話番号へのメッセージ送信中にエラーが発生しました。
テキストを受信する
この番号を使った接続は、すでにリクエストされています。1分後に再度お試しください。
この番号を使った接続は、すでにリクエストされています。{minutes}分後に再度お試しください。
会話を同期する
問題が発生しました。再度お試しください。
メッセージは配信されませんでした。タップして再試行してください。
フォームは送信されませんでした。フォーム上の任意の場所をクリックすると再試行できます。
Telegramのアカウントを接続すると、返信が届いたときに通知を受け取れるとともに、Telegramで会話を続けることができます。
サポートされていないメッセージ タイプです。
サポートされていないアクション タイプです。
ファイル
ファイルが無効です。
画像
ファイルでウイルスが検出されたため拒否されました
Viberのアカウントを接続すると、返信が届いたときに通知を受け取れるとともに、Viberで会話を続けることができます。まず、Viber アプリを使用してQR コードをスキャンしてください。
Viberのアカウントを接続すると、返信が届いたときに通知を受け取れるとともに、Viberで会話を続けることができます。接続を開始するには、Viber アプリをインストールし、[Connect (接続)] をタップしてください。
ViberのQR コードの取得中にエラーが発生しました。再度お試しください。
WeChatのアカウントを接続すると、返信が届いたときに通知を受け取れるとともに、WeChatで会話を続けることができます。接続するには、WeChat アプリを使用して、このQR コードをスキャンしてください。
WeChatのQR コードの取得中にエラーが発生しました。再度お試しください。
WeChatのアカウントを接続すると、返信が届いたときに通知を受け取れるとともに、WeChatで会話を続けることができます。接続するには、このQR コード画像を保存して、<a href=\'weixin://dl/scan\'>QR コード スキャナーにアップロードしてください。
QR コードをスキャンするか下のリンクをクリックして、アカウントをWhatsAppに同期します。その後、事前に入力されたメッセージを送信して、同期リクエストの検証を行います。(コード: {{code}})。
以下のリンクをクリックして、アカウントをWhatsAppに同期します。その後、事前に入力されたメッセージを送信して、同期リクエストの検証を行います。(コード: {{code}})。
WhatsAppの接続情報の取得中にエラーが発生しました。再度お試しください。
これには数分かかる場合があります。
返答を得るために、チャットのキューでお待ちになる必要はありません。チャット記録を当社のチームに送信します。その後、チームができる限り早くメールでご回答いたします。
ライブ チャットのキューを離れようとしています。これにより現在の順番は失いますが、新しいライブ チャットを開始すれば、いつでもキューに再び加われます。
モードが見つかりません
エージェントを待っています...
代わりにメールを送信しますか?
チャット リクエストをキャンセルしますか?
チャットをキャンセル
メールを送信
確定
代わりにメールを送信
引き続き待つ
Squarespaceアシスタント
キューの状況を表示
この言語のライブ チャット サポートは現在オフラインです。
チャットボットが動作しない場合は
当社チームにご報告ください。
こんにちは
必要なサポートをご提供します。
当社の自動サポート アシスタントは、迅速な回答が必要な場合に便利です。
人間の担当者と話すことをご希望ですか?サポート アシスタントにお申し付けいただければ、ライブ チャットまたはメールを通じて当社のチーム メンバーにおつなぎすることが可能です。
お問い合わせ
サポートを受ける方法
自動サポート アシスタントの利用
チャットボットからいつでも迅速に回答を得られます。質問を入力すると、すぐにガイダンスが表示されます。
サポート チームとのメールまたはチャット
さらにヘルプが必要ですか?当社のサポート アシスタントが、カスタマー サポート チームのアドバイザーにおつなぎします。
必要なサポートをご提供します。
より迅速なサポートをご希望の場合は、ログインしてください。
ライブ チャットはご利用になれません。
英語でチャット
ライブ チャット
ライブ チャットは現在ご利用になれません。メールをお送りいただければ、12時間以内に返信いたします。
ライブ チャットは現在お客様の言語ではご利用になれません。英語でのチャットをお願いいたします。もしくは、メールをお送りいただければ、12時間以内に返信いたします。
ライブ チャットは、月曜日から金曜日の午前10時から午後4時 (中央ヨーロッパ時間) に、お客様の言語でご利用になれます。
ライブ チャットはお客様の言語ではご利用になれません。メールをお送りいただければ、12時間以内に返信いたします。
ライブ チャットはお客様の言語ではご利用になれません。英語でのチャットをお願いいたします。もしくは、メールをお送りいただければ、12時間以内に返信いたします。
受賞歴のあるカスタマー サポート チームとリアルタイムで会話し、素早く回答を得ることができます。月曜日から金曜日: 午前10時から午後4時 (中央ヨーロッパ時間)
ライブ チャットは現在ご利用になれません。メールをお送りいただければ、12時間以内に返信いたします。
ライブ チャットは、月曜日から金曜日の午前10時から午後4時 (中央ヨーロッパ時間) に、お客様の言語でご利用になれます。
スキップしてチャットに移動
本人確認にご協力ください
ボタンをクリックしてメールアドレスを確認し、アカウントにログインしてください。
メールアドレスを認証
 to open the link editor for more options.